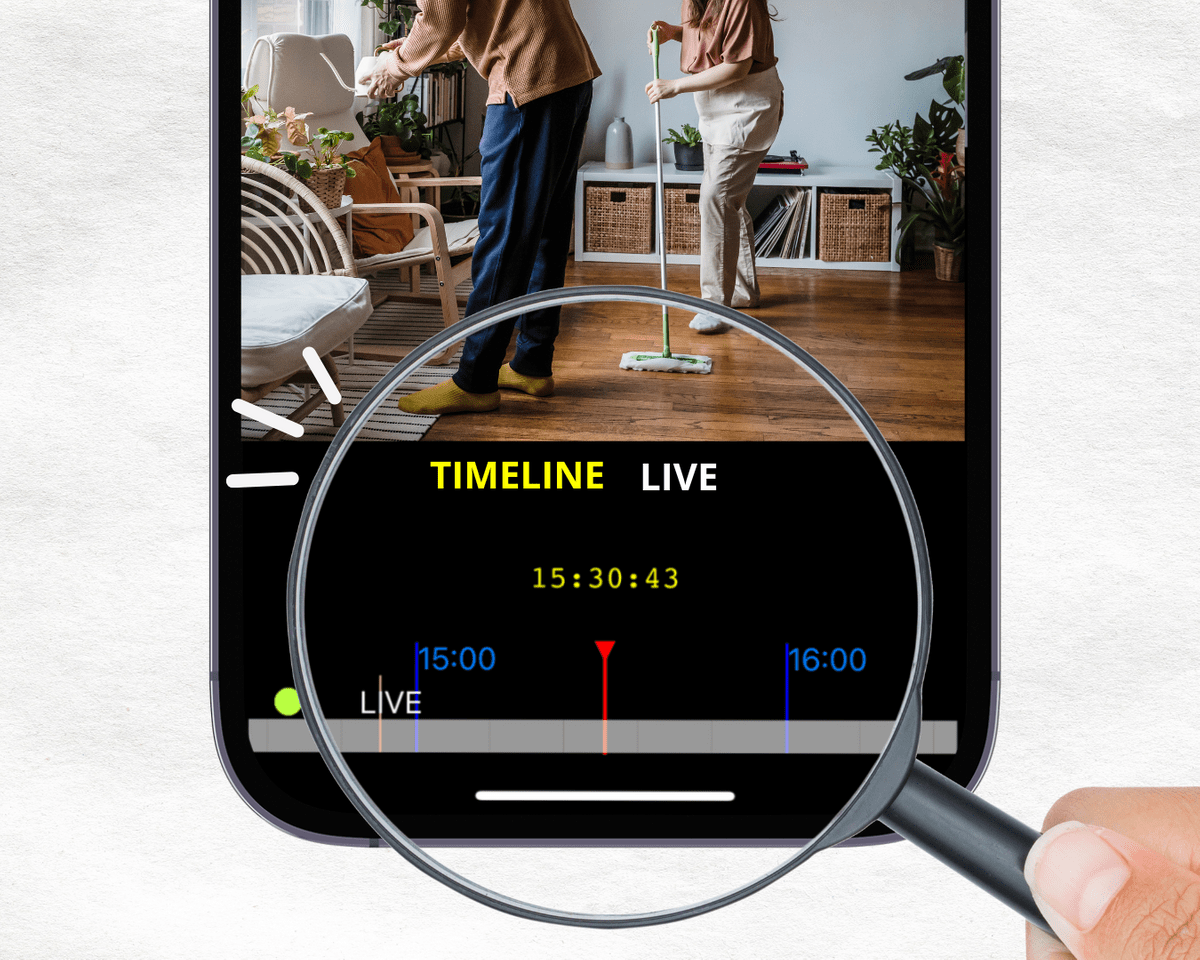
Timelines are like digital roadmaps for your videos, showing you exactly when events occurred. They make it incredibly easy to pinpoint the moments you're searching for, and the best part? It's completely free to use! If you're using an Amaryllo camera with a microSD card slot, simply insert a Class 10 SD card up to 128GB to get started. For models without a microSD card slot, your camera is ready to go out of the box. Keep scrolling to learn how to access your timeline effortlessly.

Once you have inserted the microSD card, ensure it is formatted for compatibility with our system. It's simple—just open the app, navigate to the settings tab, select "Recording," and tap "Card Format." Once completed, videos will be recorded onto your microSD card and will start utilizing the storage space. Depending on the card's capacity, once it fills up, new recordings will overwrite older ones, so you don't have to worry about managing space.
To verify if your setup is successful, leave the camera recording for 10-15 minutes. Afterward, follow these three steps to access the recording:
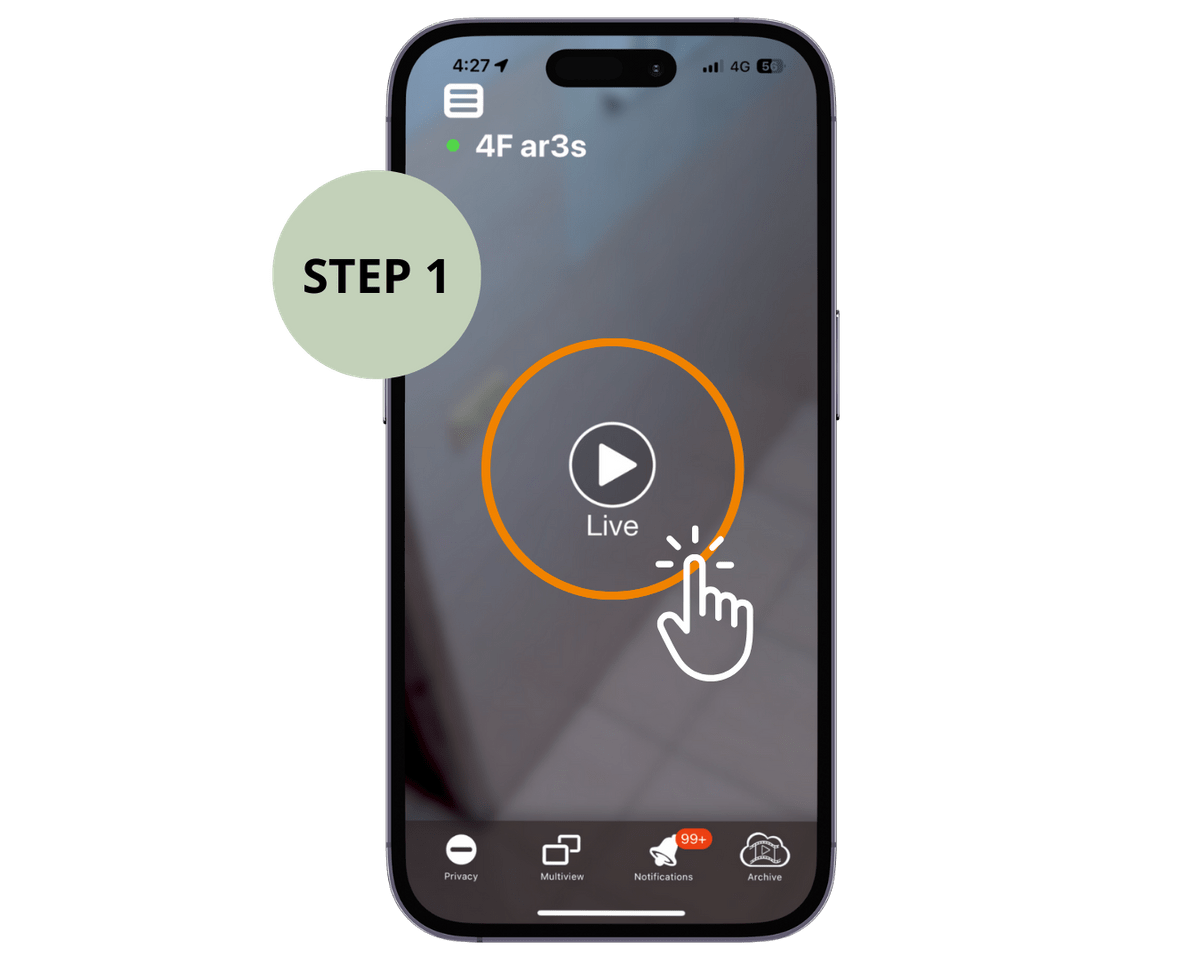
Step 1. Tap and open the live stream function in the app.

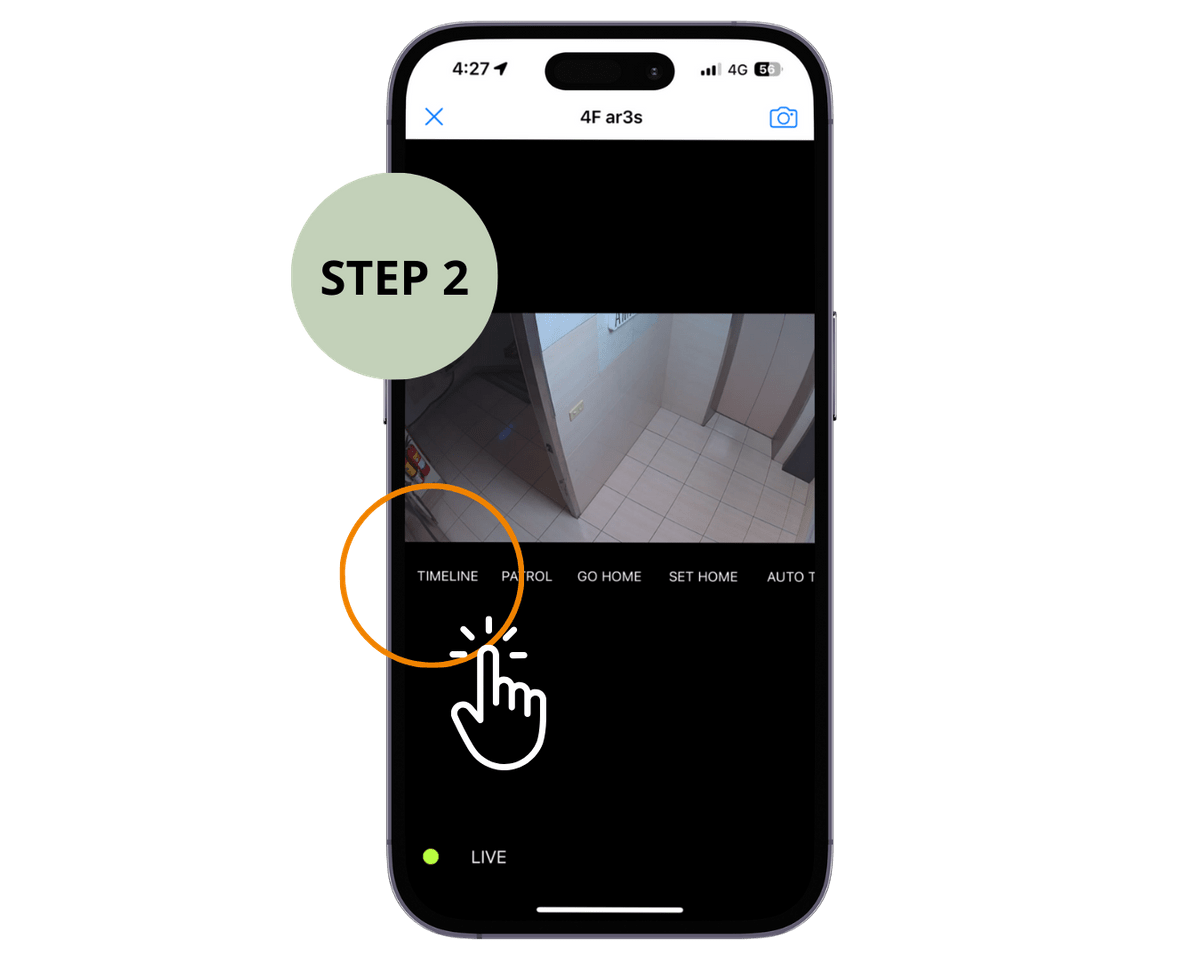
Step 2. Tap on the "Timeline" feature

Step 3. If the camera has been recording for some time, you will be able to scroll to the right to play back the video.
